User Management
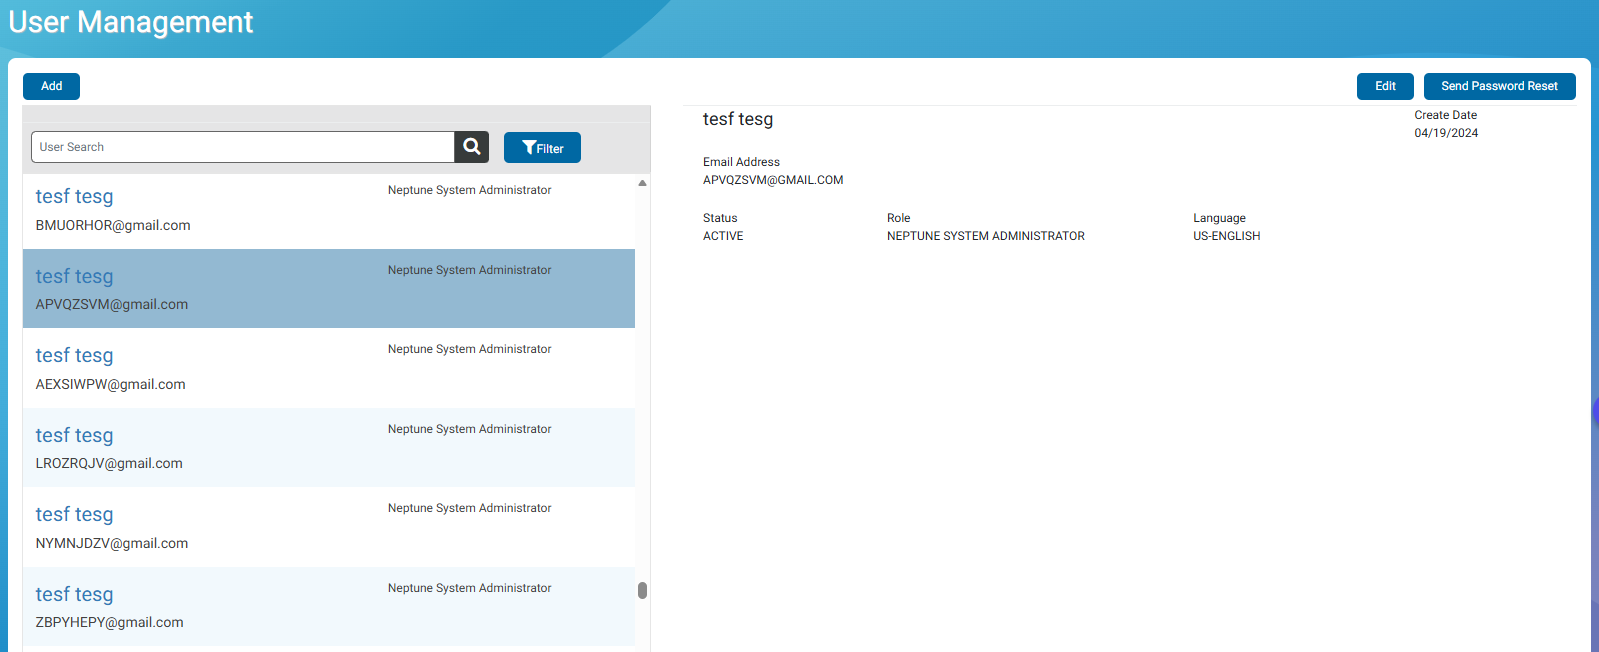
As a Utility Administrator, you can view, set up, and manage users within your utility. The default view of the User Management page shows a list of current Active users in the left panel. When you click a user, the details for the user displays in the right panel, which include:
- User name
- Date the user was created in the system.
- Email address.
- Status – active, inactive, locked.
- Role within the utility.
- Language the user selected upon first login.
In the user list grid, users may be grouped under the heading for the name of the utility to which they are assigned.
What You Can See and Do in This Window
Click a link to display the related information or step-by-step procedure. Note that you may have access only to certain functions based on your role.
|
– |
|
| – | |

View Active Users
When you click a user in the grid, the system displays the user details in an overlaying window. You can click through the user list to display the details for each user selected. You can also search users to display and select users by role or status. Only Active users are included in the default list.
Search Users
You can search for a user based on the user name. You must know at least two characters of the name on which you want to search. The search result returns users in which the characters appear anywhere in the sequence you indicated. For example, if you type ah, the results may be anywhere within the names returned, such as Hannah.
You can search by a specific role or user status to narrow down the search results.
- On the Neptune 360 navigation panel, click User Management under Platform Management.
- In any field, enter the first few characters of the criteria value, and then click Search.
The system displays a grid with users that match the search criteria in alphabetical order, by utility. You can sort the data in the grid.
- If you want to search by a specific status or role, in appropriate field, select the search criteria, and then click Search.
Unlock a User
To find a user to unlock, you can filter user list by the Locked status. After you reset a lock user to Active status, the user must reset their password.
- On the Neptune 360 navigation panel, click User Management under Platform Management.
- Search users by the Locked status.
- Click the name for the user that is that is locked.
- Click Edit, and then change the status from Locked to Active.
- Click Send Password Reset.
Create or Edit a User
If you are a Utility Administrator, you can add or edit the following user information:
- Name.
- Email address.
- Phone.
- SDK Access.
- Utility.
- Role.
All fields are required and you cannot leave any blank.
- On the Neptune 360 navigation panel, click User Management under Platform Management.
- To create a new user, under the User Management page title, click Create , or to create a new user within a specific utility click Create next to the utility heading in the grid. Otherwise, in the user list grid, click the name of the user you want to edit.
The system displays the editable fields.
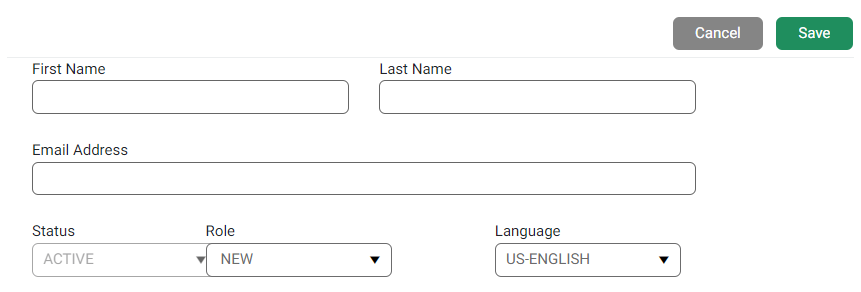
- Edit the user information as required.
You can search a utility to assign it. Note that you can only send a password MFA reset email when you edit a user, not when you create a user.
- After you finish defining the user details, click Save.
Neptune® 360™ displays the edited user information in the list in the left panel.
If you are a Utility Administrator and have access to multiple sites, you can add one or more utilities to the user.
Remove a Utility from a User
If you have administrator permissions, you can remove a utility from a user.
- On the Neptune 360 navigation panel, click User Management under Platform Management.
- In the user list grid, click the name of the user from whom you want to remove a utility.
- In the User Role field for the utility you want to remove from the user, scroll down and click [X] Remove.
- Click Save to apply the removal.
Send a Reset a Password Email
If you have permission, you can send password reset instructions to a user at any time, which clears the user’s current password and sends an email notification to the email address shown. Users are required to reset their passwords at least once within 365 days of initial password setup, and Neptune sends a reminder approximately 30 days in advance.
- Click the user for whom to reset the password.
- Click Send Password Reset.
The system sends password reset instructions to the user and displays a confirmation message at the top of the window. The system-generated email contains text similar to the following:
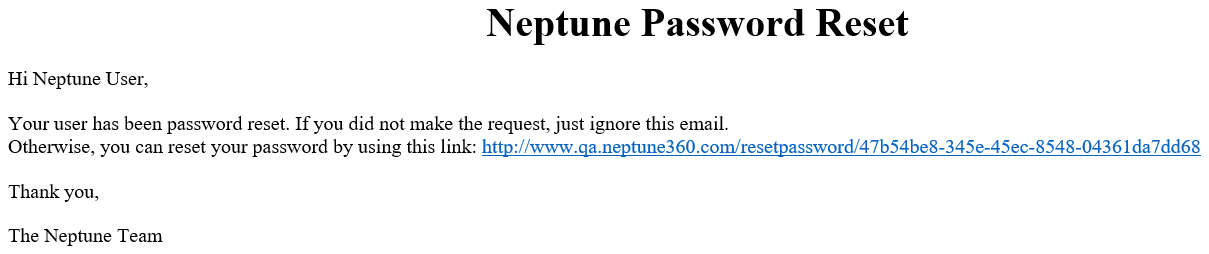
The Neptune Password Reset Notification expires six hours after it is sent to a user.
Reset a Password
All Neptune® 360™ users must reset their passwords at least once every 365 days from the day of initial password setup or the last password reset. To ensure users comply with password reset rules, the system sends a reminder 30 days before password expiration with a link to the password reset window. The link expires after six hours. For best security, do not create a password that:
- Can be easily guessed, such as birthdates, pet names, and addresses.
- Uses any part of your previous password in your new password.
- Uses repeating characters or numbers next to each other.
- When you receive an email to reset your password, click the link to display the password reset window.
- In the Password field, enter your new password following the minimum security requirements outlined in the window.
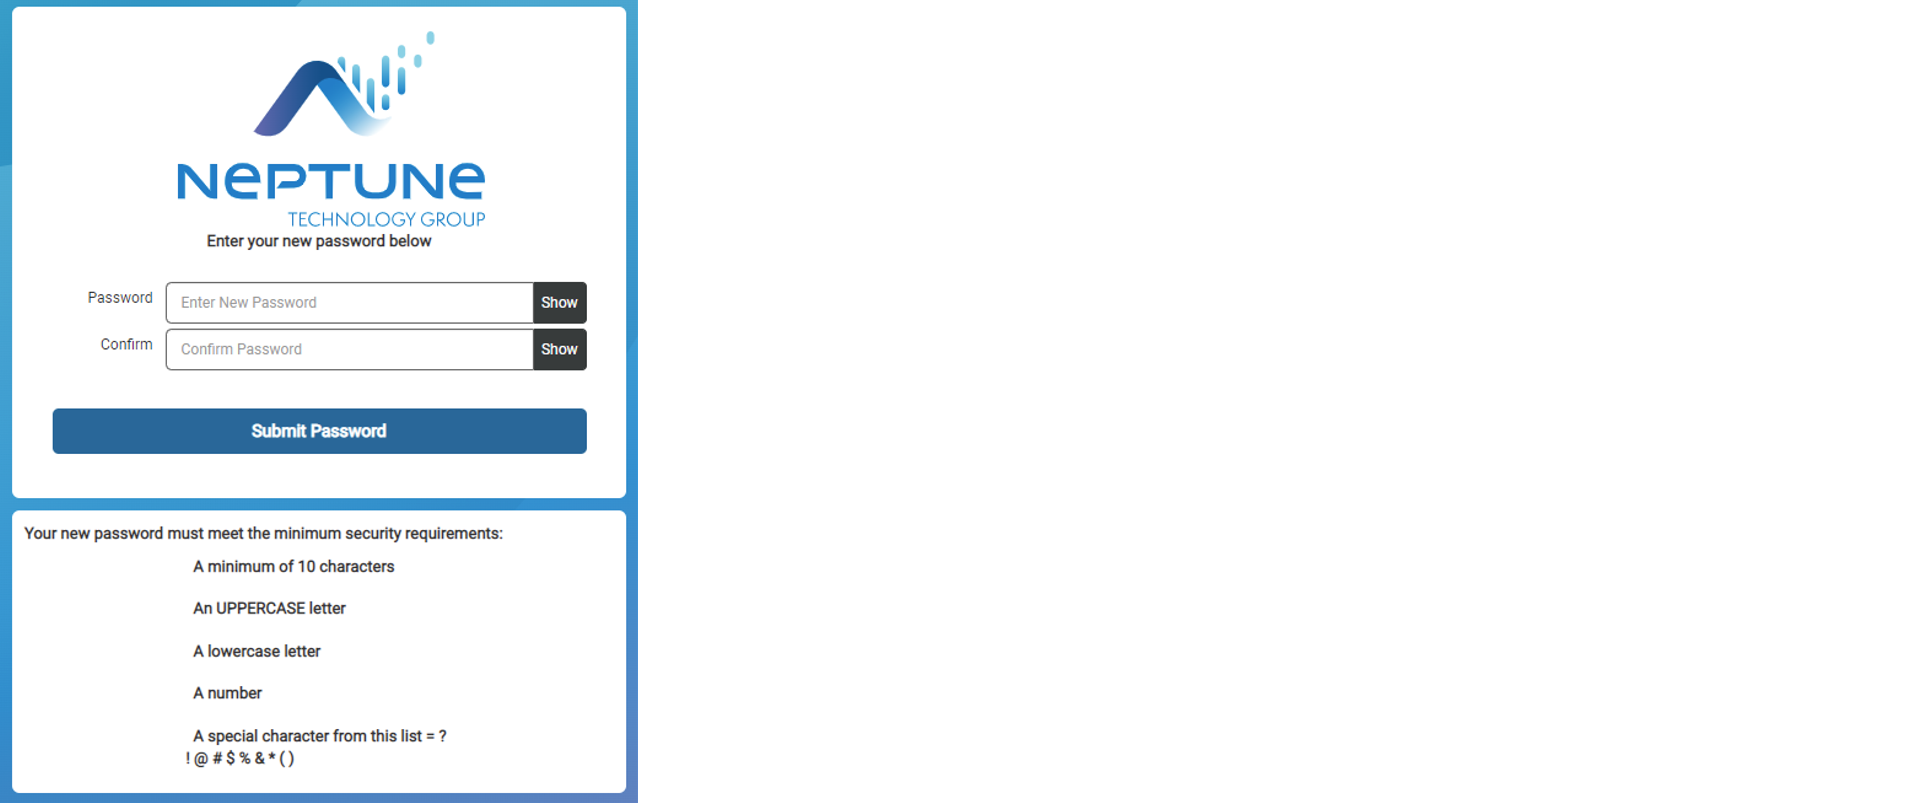
- In the Confirm field, enter your new password again.
- Click Submit to change your password.
Add Multifactor Authentication to Your Login
If your utility uses Multifactor Authentication (MFA![]() Multifactor Authentication.), Neptune 360 prompts you to download and set up the authenticator when you first log in. You perform these steps only on the first login. Before taking advantage of the additional account security MFA provides, on your mobile device, download and register with one of the two supported third-party authenticator apps: Google or Microsoft Authenticator.
Multifactor Authentication.), Neptune 360 prompts you to download and set up the authenticator when you first log in. You perform these steps only on the first login. Before taking advantage of the additional account security MFA provides, on your mobile device, download and register with one of the two supported third-party authenticator apps: Google or Microsoft Authenticator.
- Log in to Neptune 360 using your regular email and password Neptune provided.
- Follow the prompts to download and register the MFA authenticator app for your phone type.
After you perform initial registration for Neptune 360, you cannot switch authenticator apps.
Microsoft Authenticator (free download)
-
MS Authenticator - Google Play Store Download Link
-
MS Authenticator - Apple App Store Download Link
Google Authenticator (free download)
-
Google Authenticator – Google Play Store Download Link
-
Google Authenticator - Apple App Store Download Link
- Scan the QR
 Quick Response, a type of barcode. code or enter the key indicated into the 2-step authenticator app on your phone.
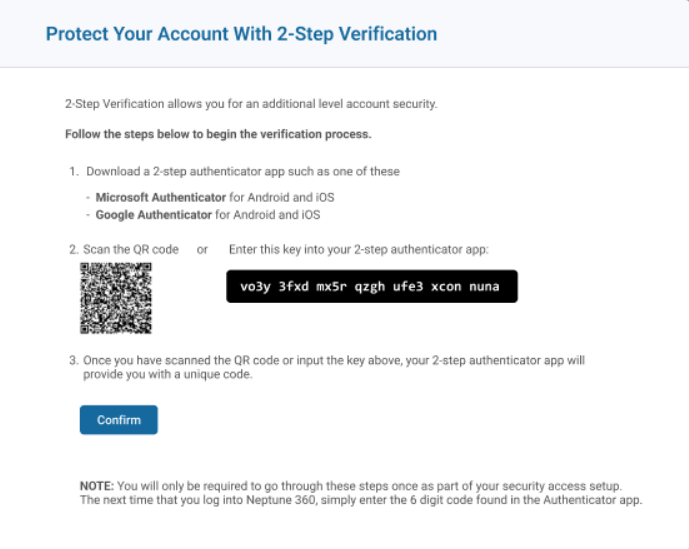
This is the only time you perform this step as part of setup.
- Click Confirm.
The authenticator app is now connected to your Neptune 360 account and automatically generates time-based one-time passcodes every 60 seconds.
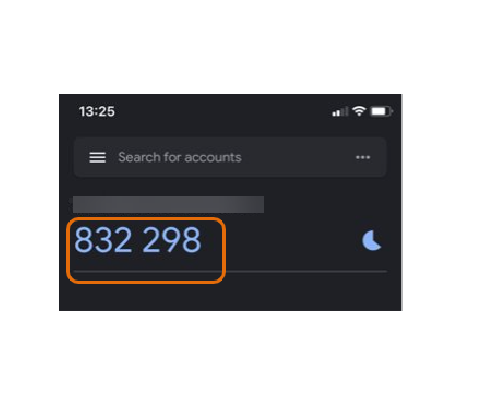
- In the subsequent 2-step verification window, enter the verification code the authenticator app provided.
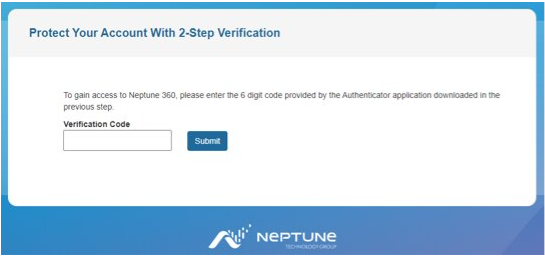
- Click Submit to access Neptune 360.
1. Navigate to Neptune 360 and log in as usual.
2. Enter the one-time code found in your previously registered authenticator app, as prompted.
3. You now have access to Neptune 360.
If you experience any issues logging in, contact your utility's IT department.
